
Installation Guide
Solar Pump Inverter Installation Guide: Factory Settings, 1-Minute Startup and Fault Codes
When the inverter is configured before shipment, the installer should not spend the first hour guessing parameters. The job is to verify the pump, connect the wires and watch the first run.
This guide covers what we normally set in the factory, how to start quickly after delivery, and what to do when a 111-777 fault code appears.
Pre-set
factory
Wire
PV + pump
Code
111-777
Factory Settings
What we normally prepare before shipping
For configured orders, our factory does the boring work first. The installer still needs to verify the site, but the main pump logic should already be close to ready.
Motor data match
Voltage, phase, pump power/current range and frequency direction are checked against the information supplied before shipment.
Solar operation logic
MPPT solar pumping mode, auto start/stop behavior and low-sun running logic are prepared for normal PV operation.
Pump protection
Dry-run, overload, under-voltage, over-voltage and water level protection are enabled or prepared according to the project plan.
Sensor input plan
Tank full and well empty input direction can be checked when float switch or level sensor details are provided.
Fault display
The simple 111, 222, 333, 444, 555 and 777 code logic helps the installer identify the first issue quickly.
Shipping note
If pump data was not supplied before shipment, treat the first start as a commissioning job and confirm parameters before loading the pump.
Quick Startup
How to start in about 1 minute after wiring is ready
This is the fast path when the inverter was pre-configured and the wiring is already prepared. If the pump data is unknown, slow down and check parameters first.
1. Verify model and pump label
Confirm voltage, phase and current before energizing the system.
2. Connect PV or AC input
Check polarity, terminal tightness and DC voltage range.
3. Connect pump output
Use L/N for single-phase output or U/V/W for three-phase output, depending on the model.
4. Power on and observe
Press RUN if required, confirm water flow, current and rotation direction.
Fault Codes
Read the display first, then check the related condition
Most first-start faults are not mysterious. The code usually points to sunlight, water source, panel voltage, sensor wiring or pump load.
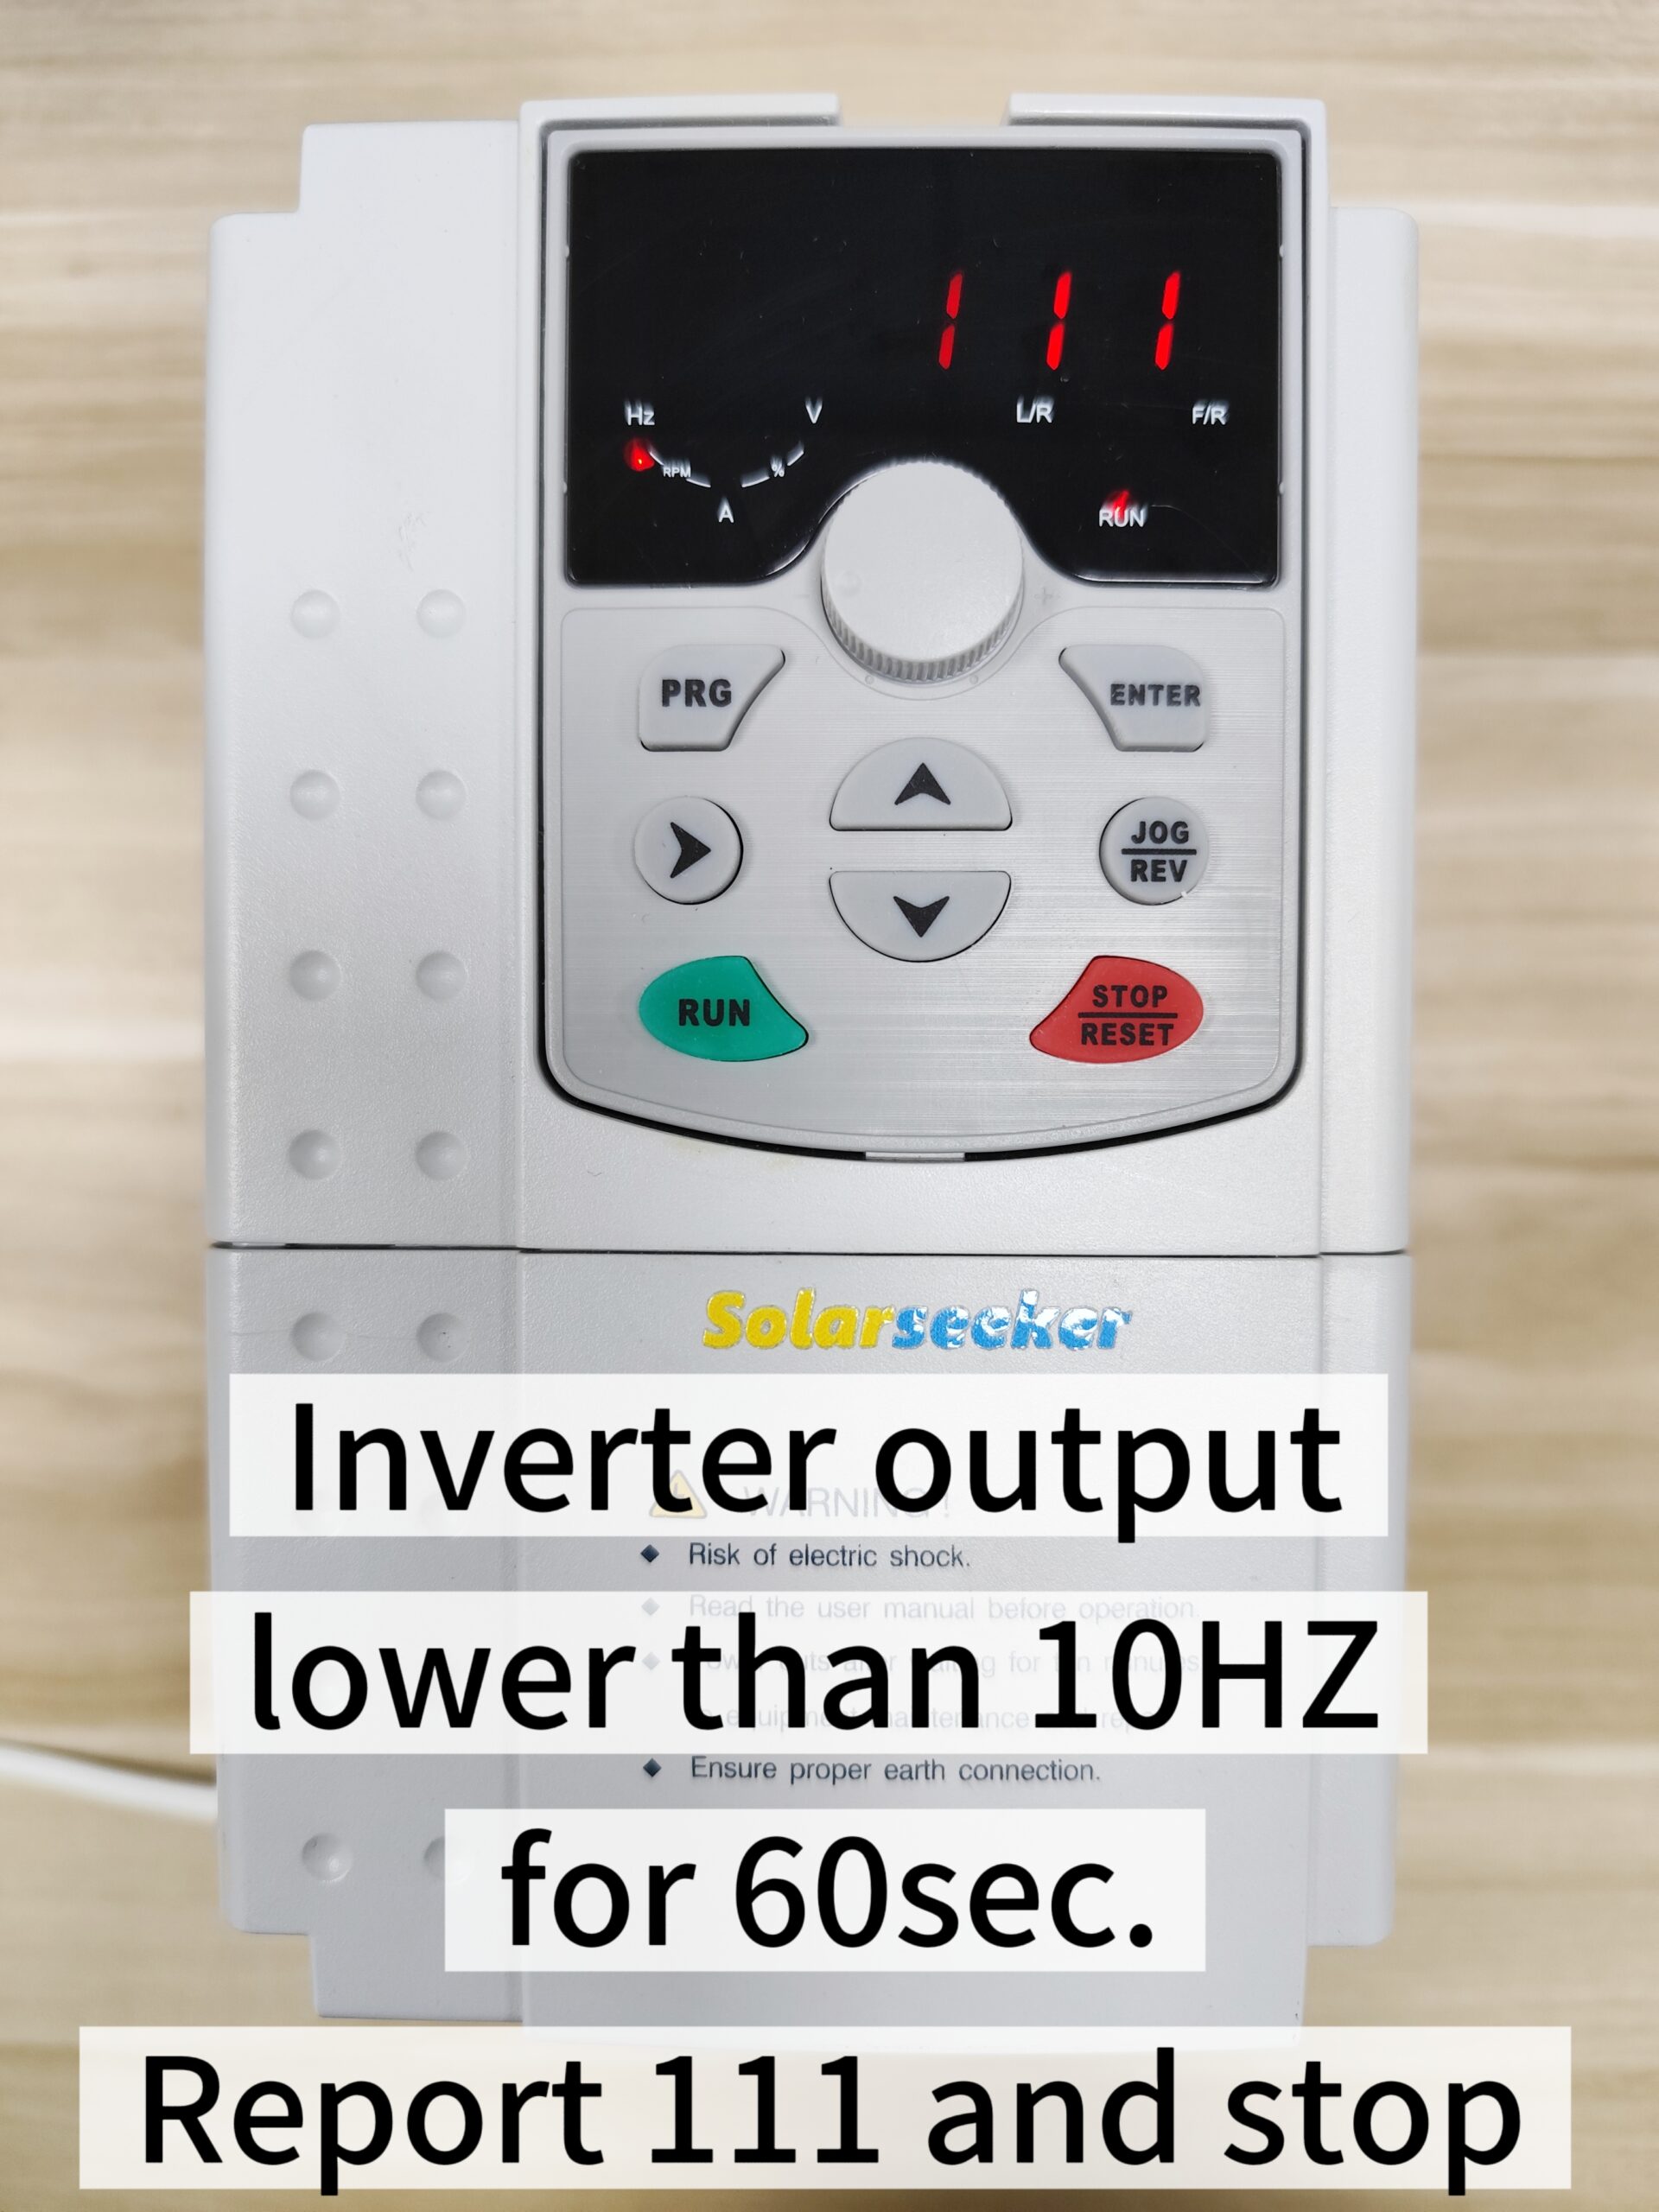
Low frequency fault
Output frequency stays below 10Hz for over 60 seconds.
Action: Check sunlight, PV connection, panel shading and whether the pump load is too heavy for available solar input.
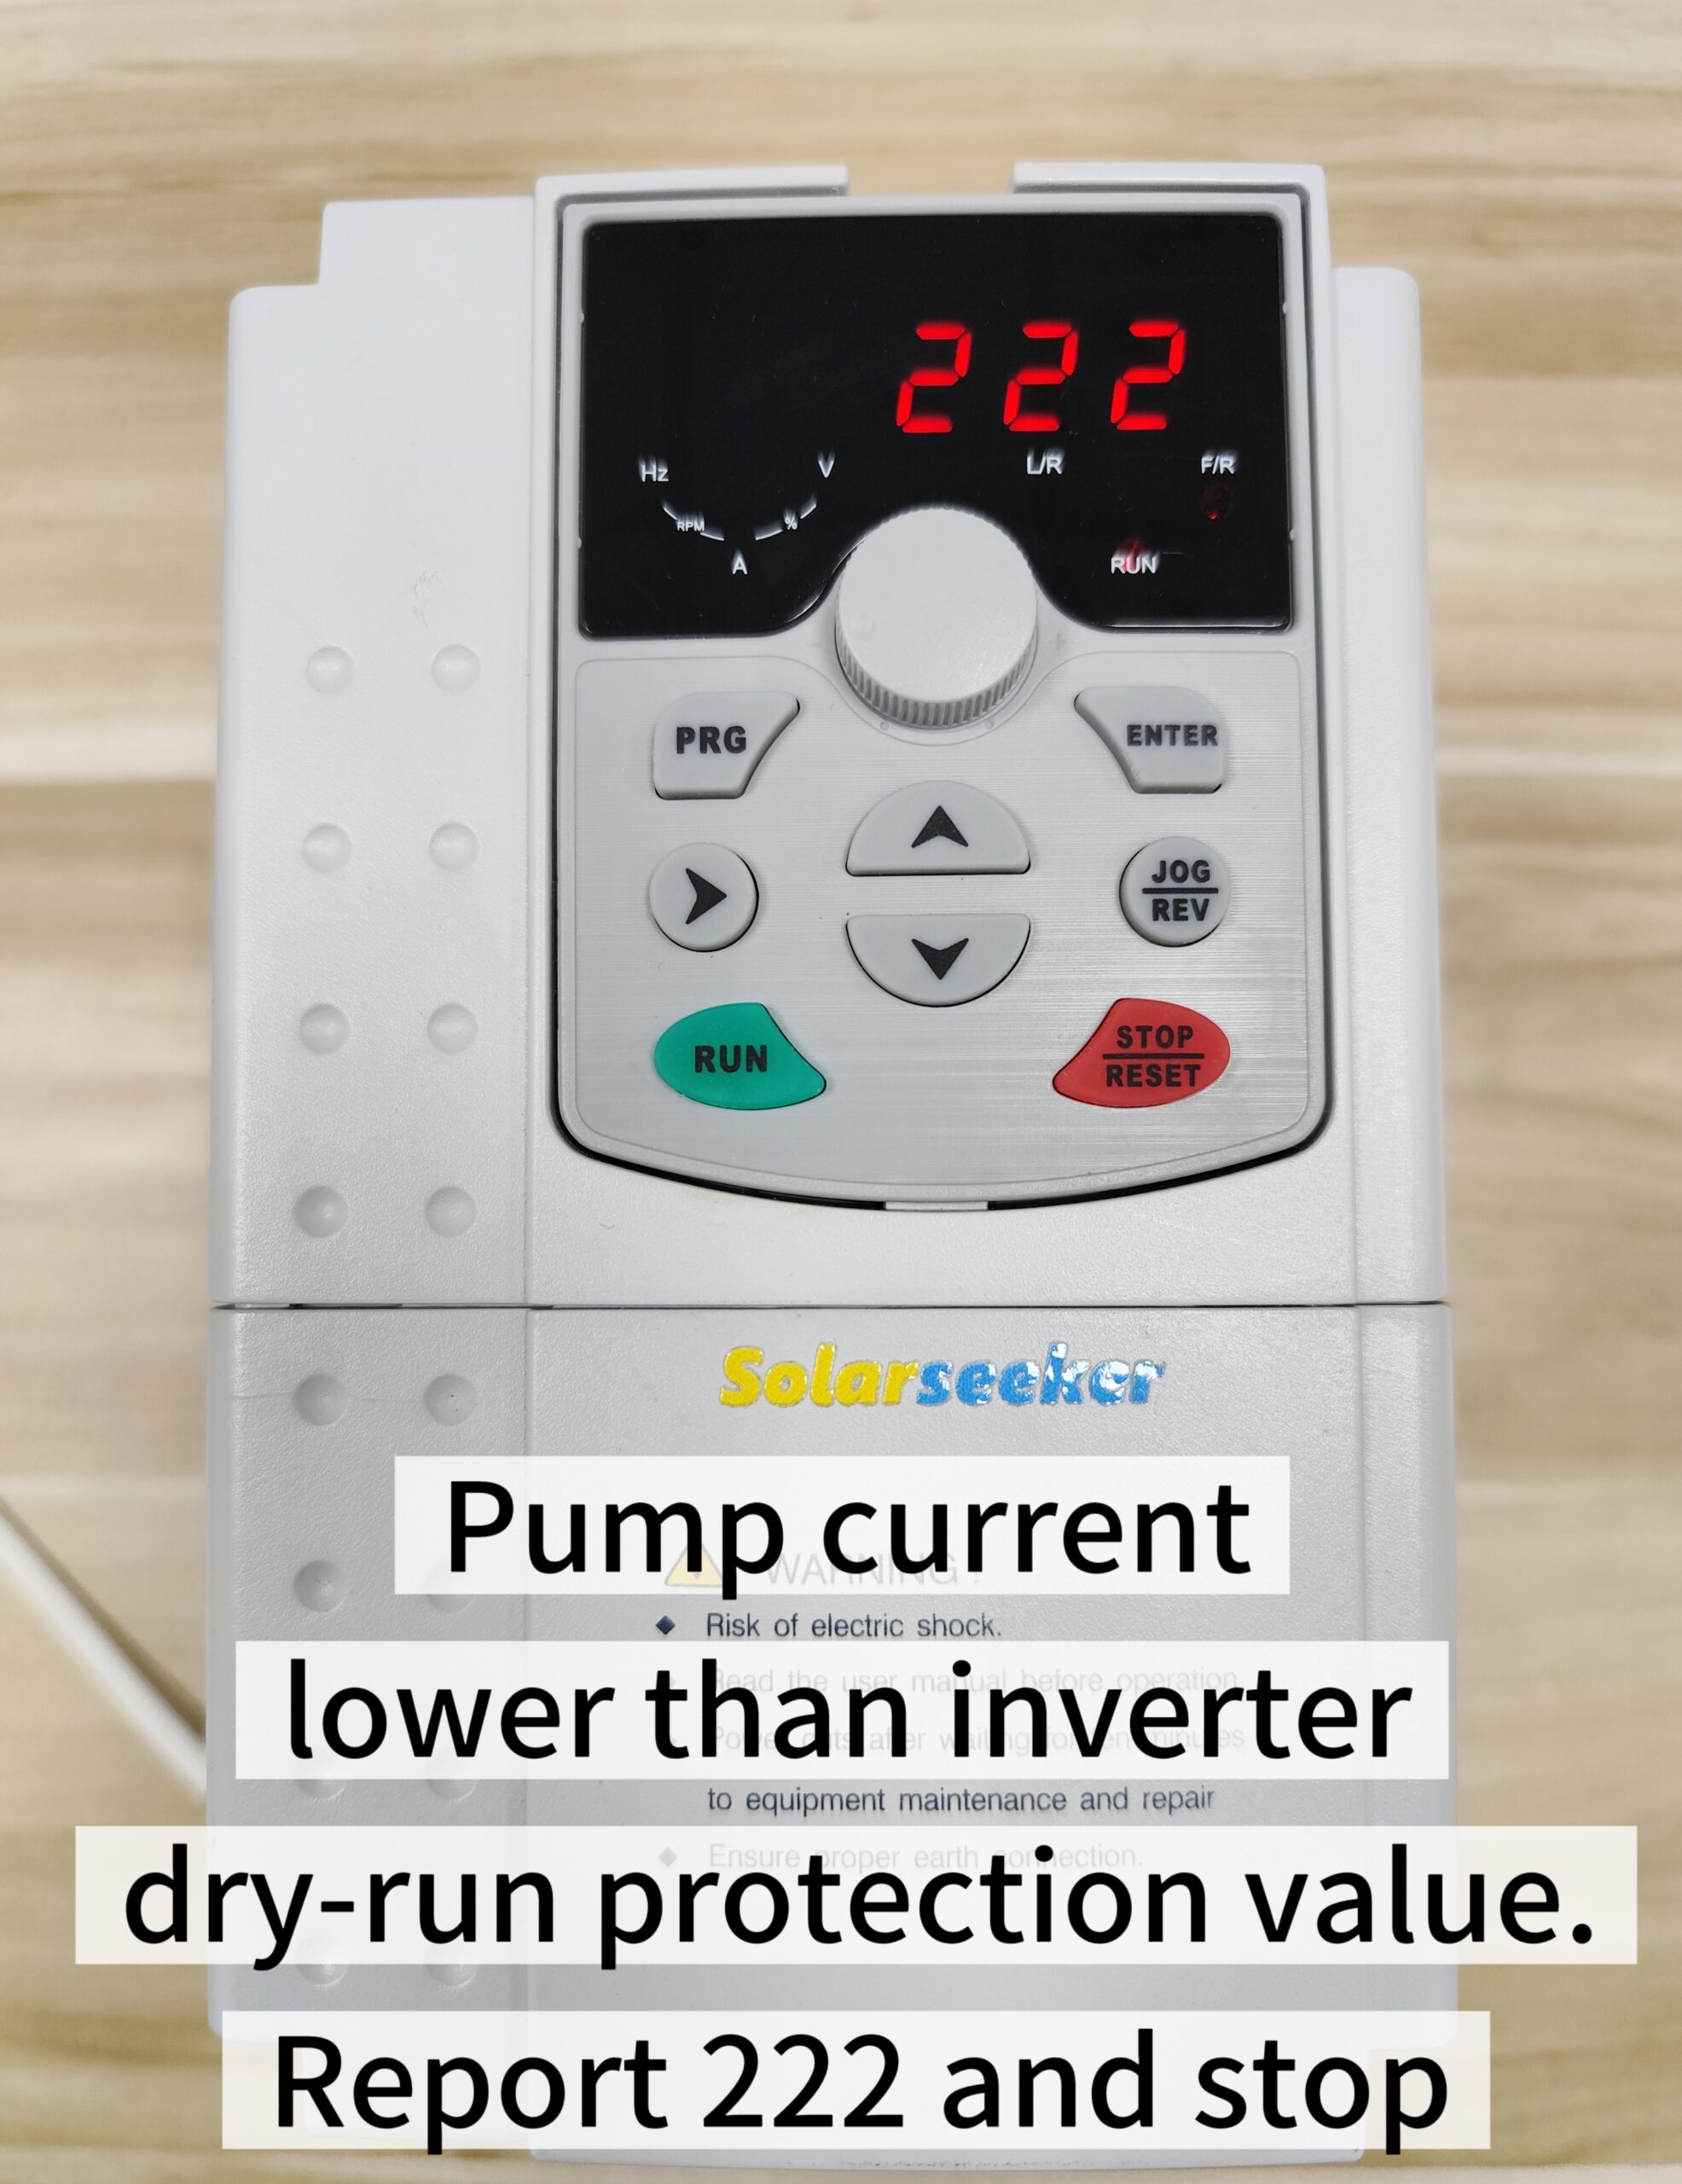
Dry-run protection
Pump current is below the dry-run protection threshold.
Action: Check water source, pump submersion depth, intake blockage and dry-run setting.
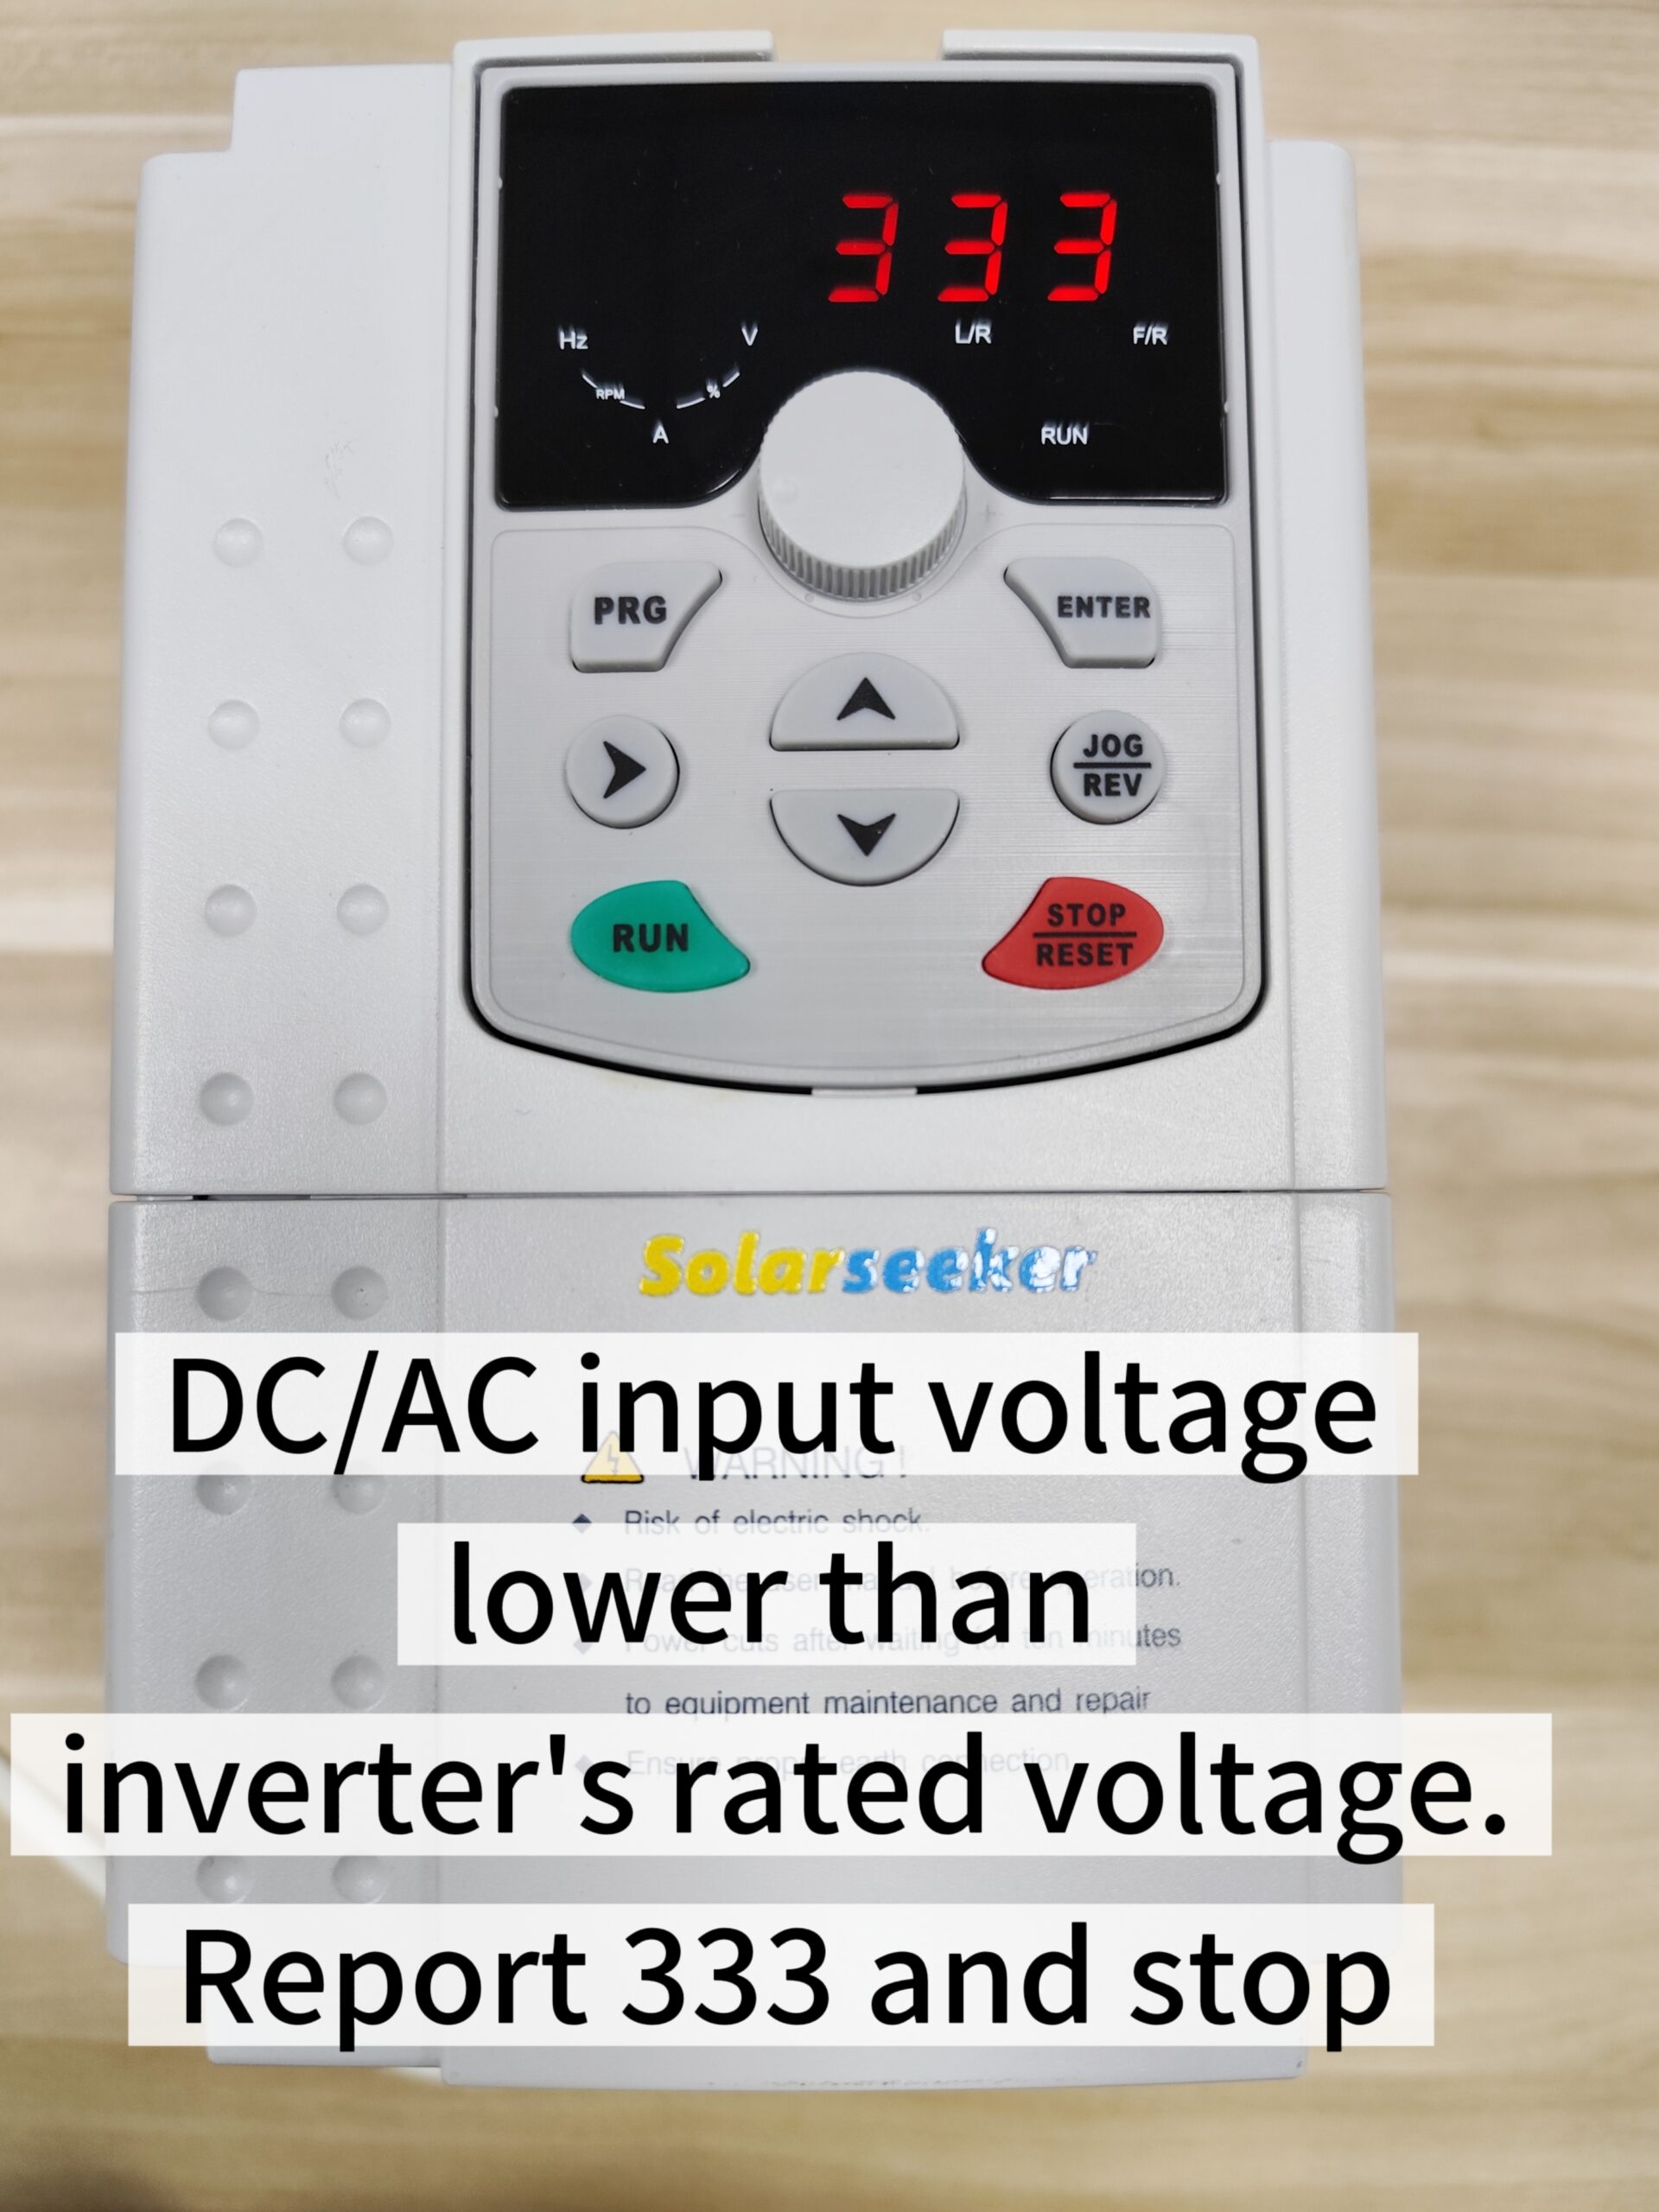
Under voltage fault
DC or AC input voltage is below the required range.
Action: Check PV series/parallel wiring, loose connectors, shading and panel quantity.
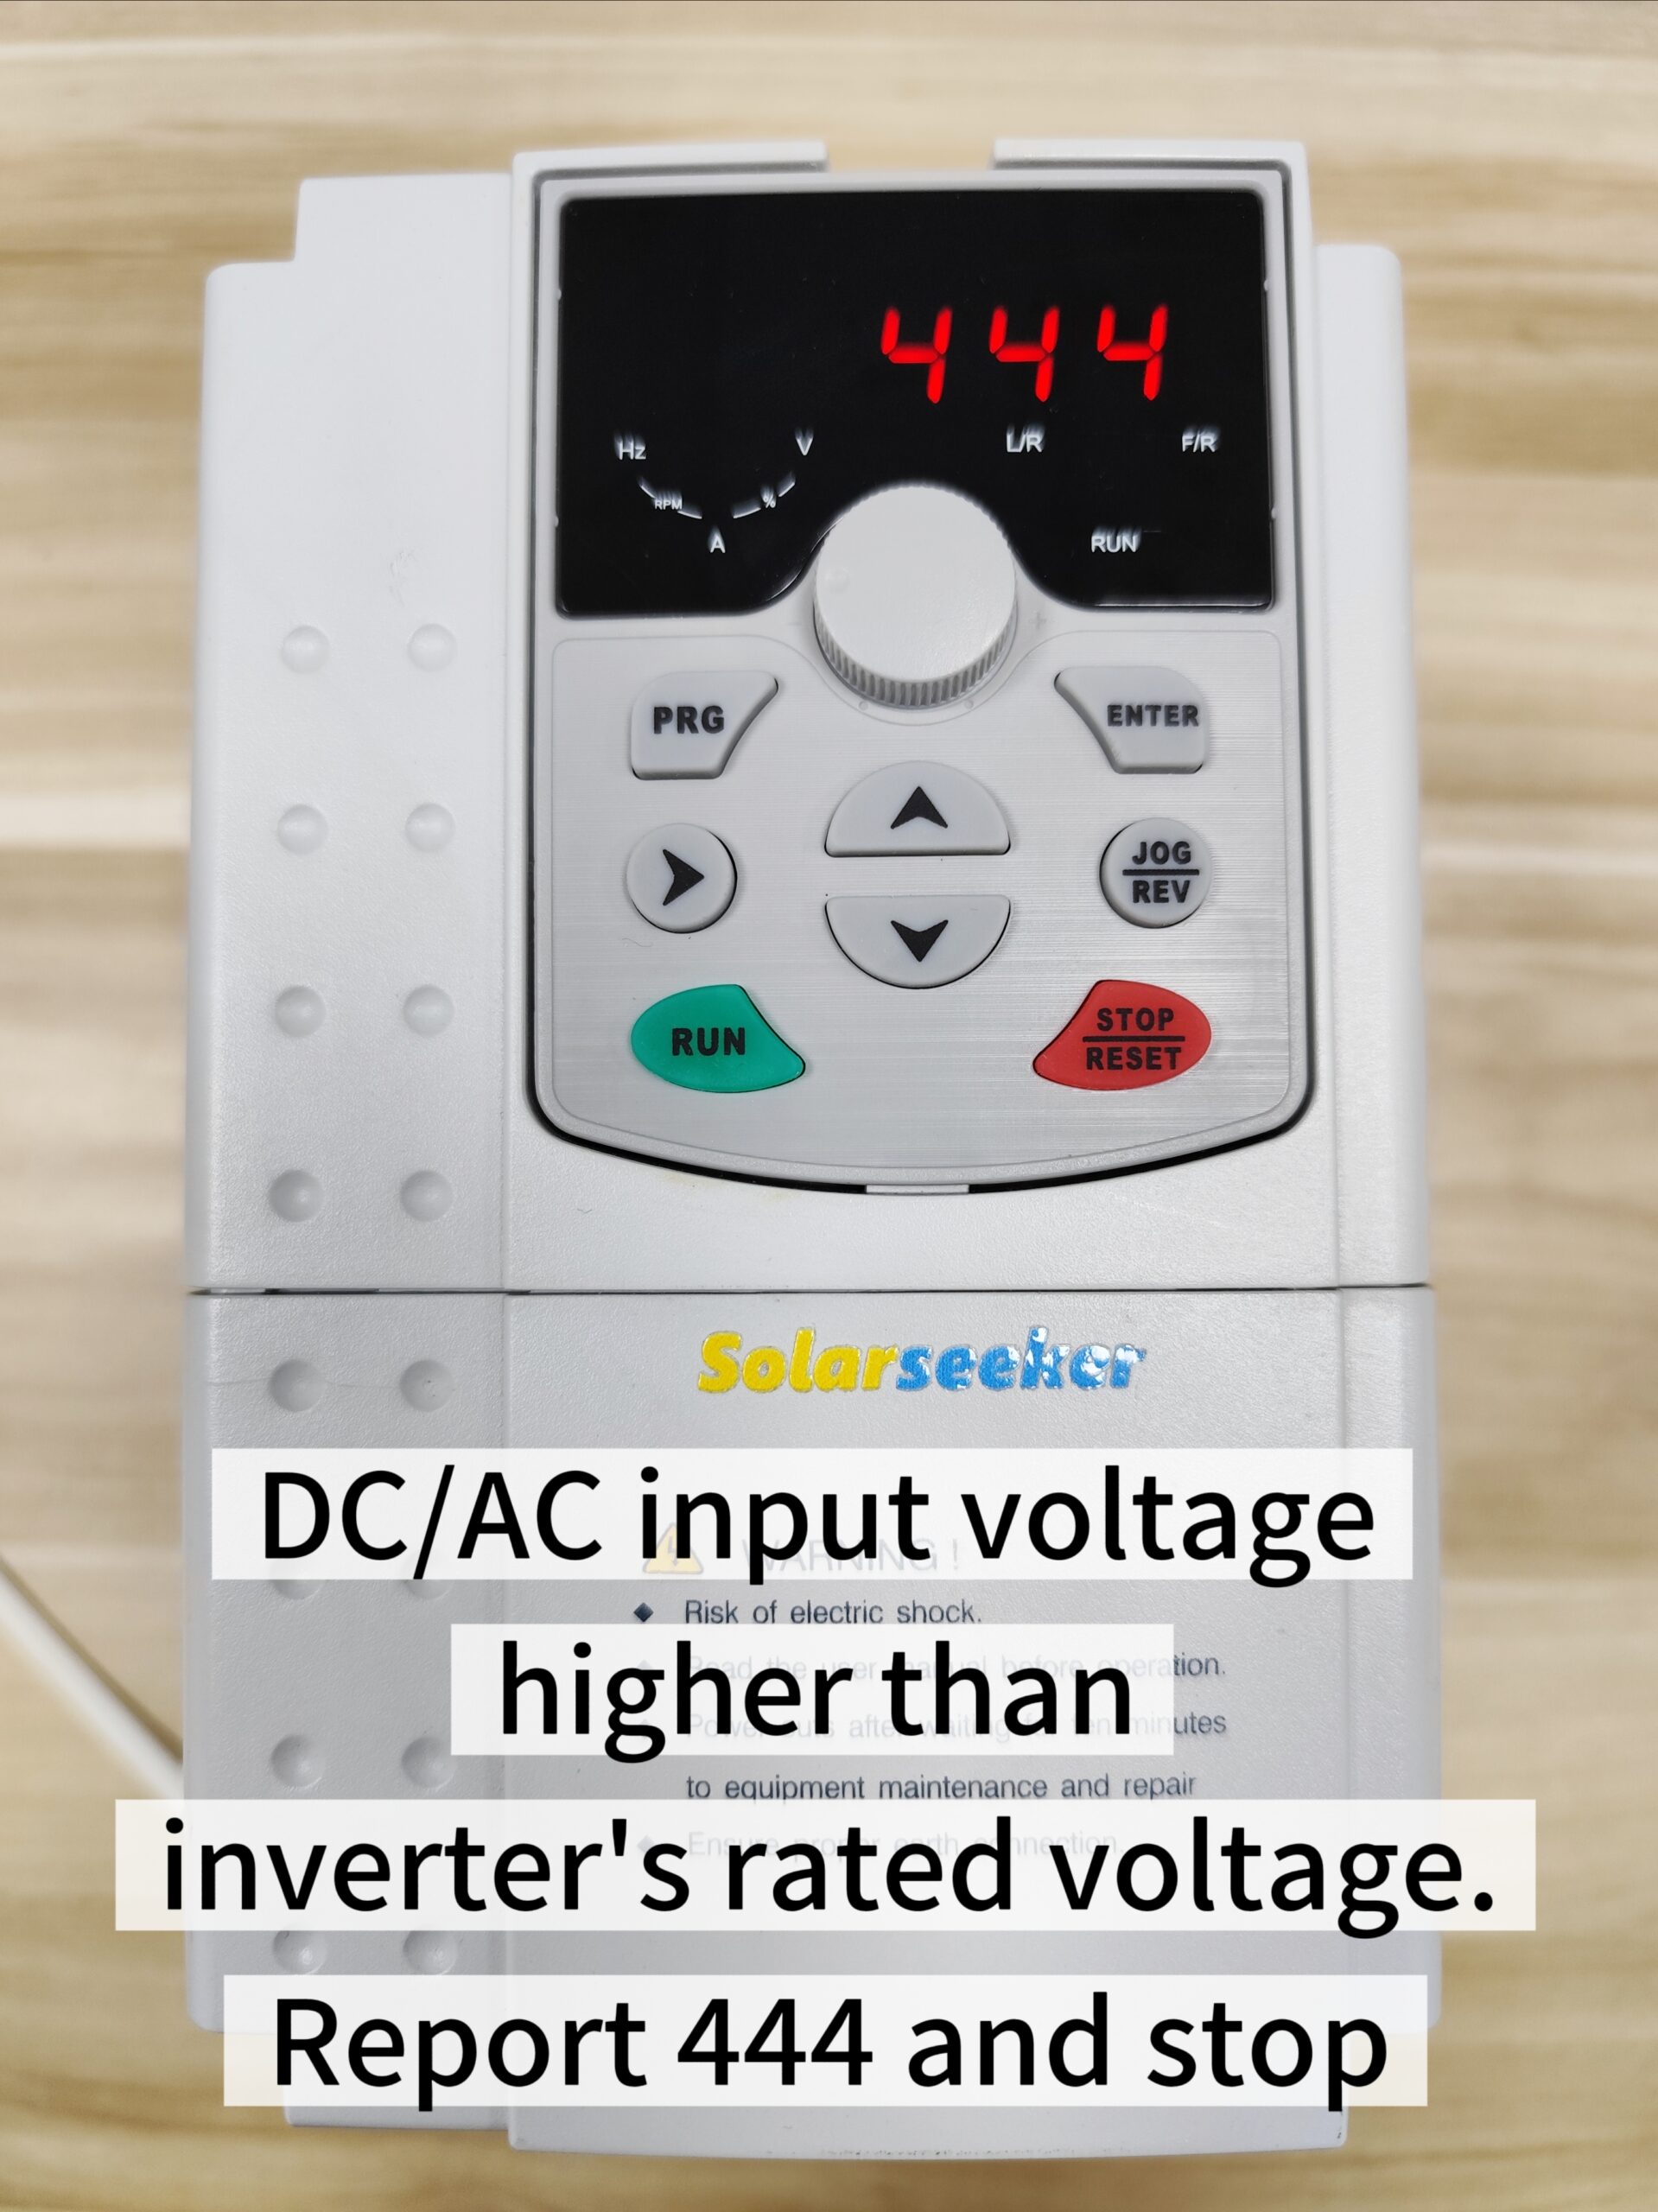
Over voltage fault
DC or AC input voltage exceeds the rated range.
Action: Reduce PV panels in series, check panel Voc and confirm the inverter input limit.
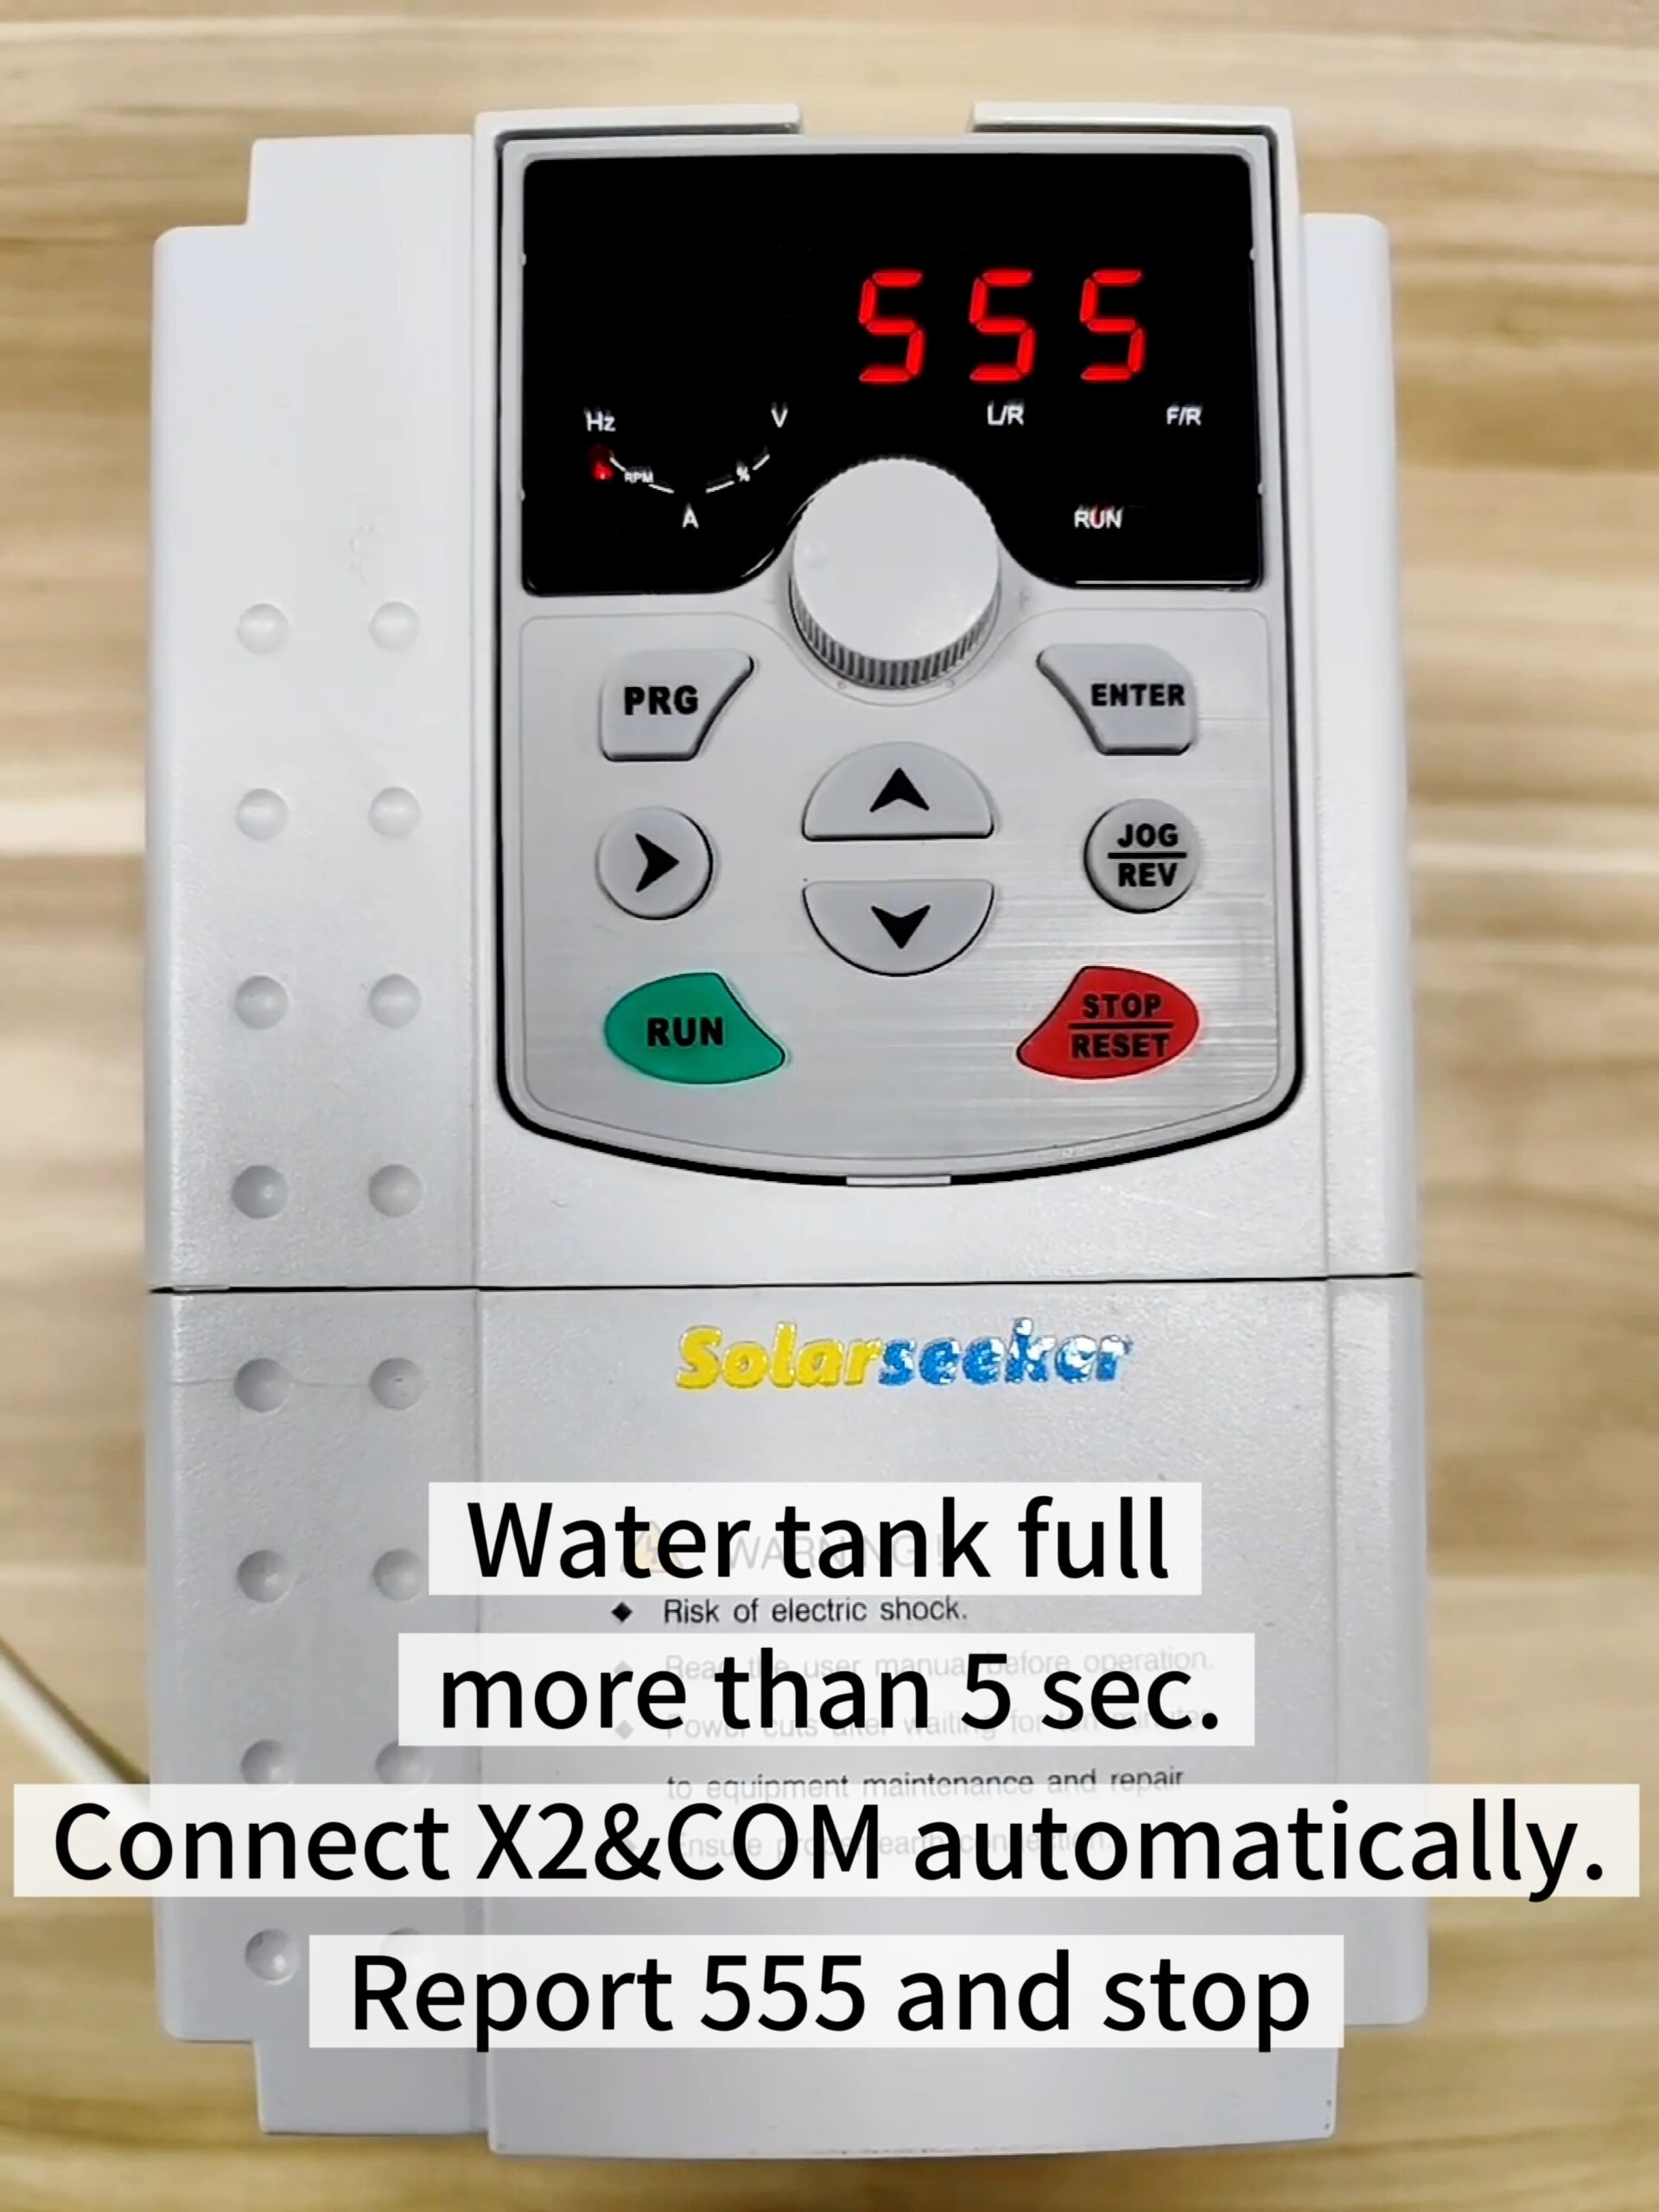
Tank full
Float switch reports full tank for more than 5 seconds.
Action: This is normal auto-pause. If tank is not full, check float switch direction and wiring.
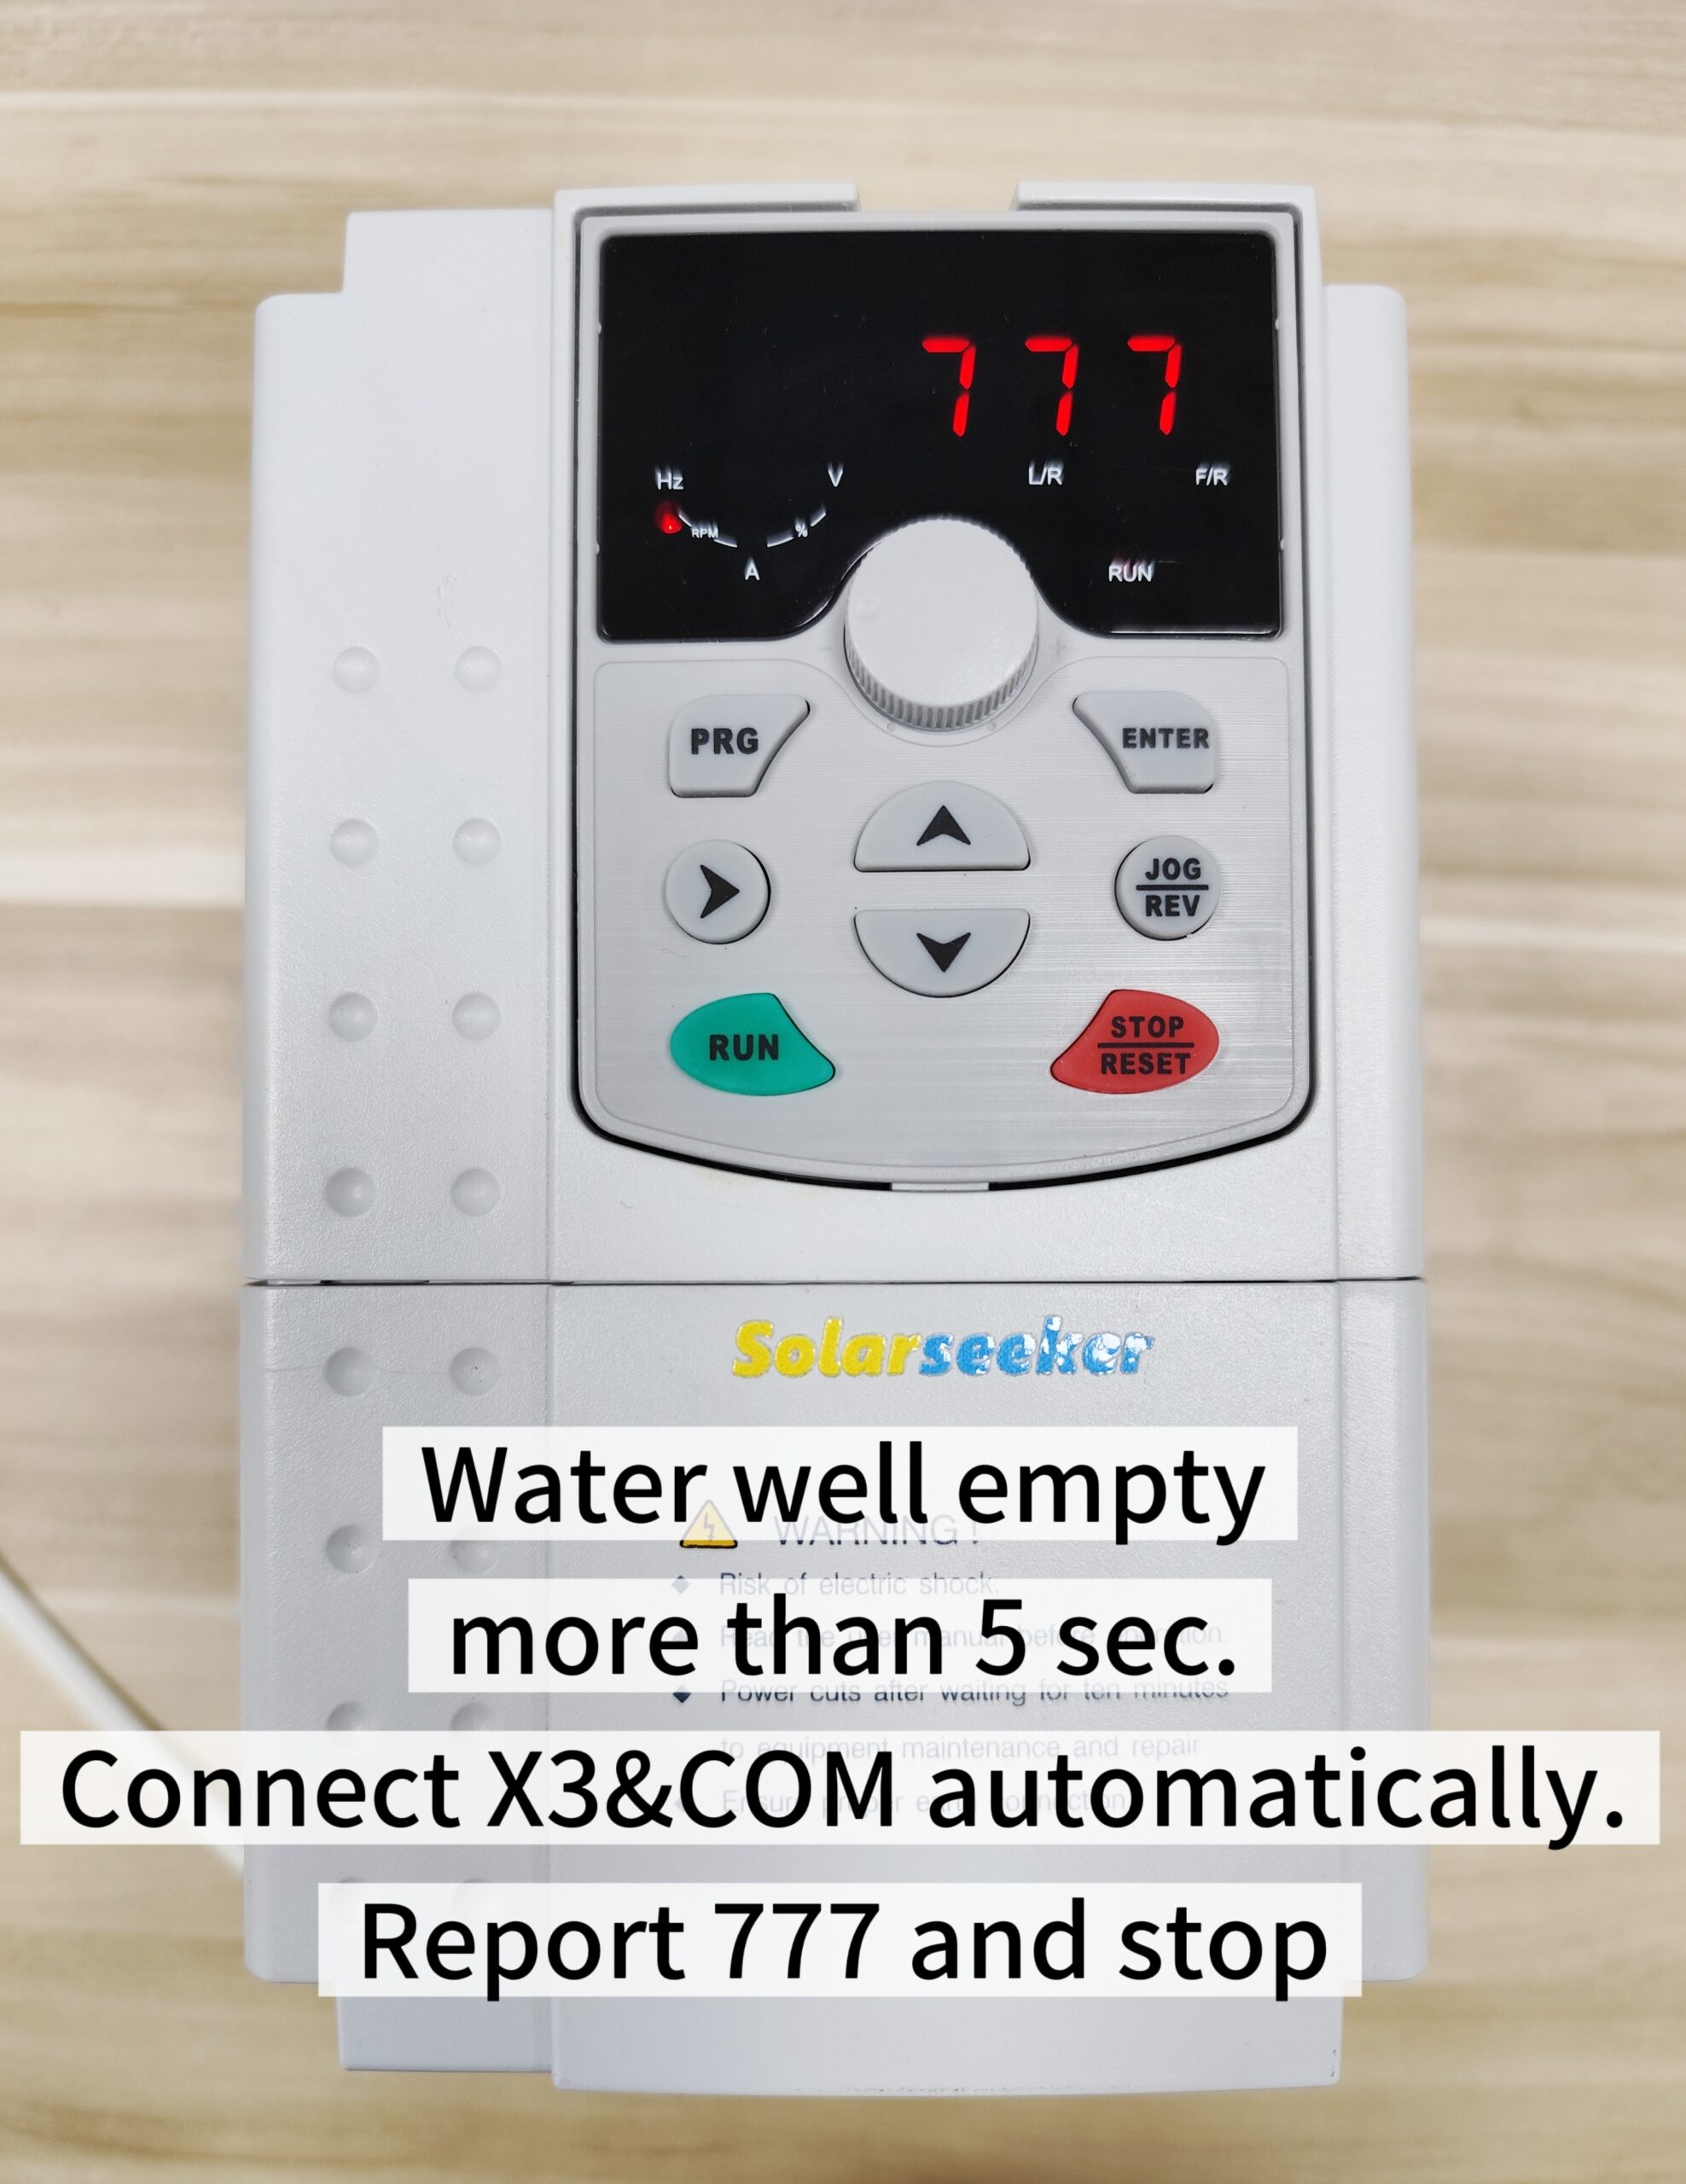
Well empty
Water source empty signal is detected for more than 5 seconds.
Action: Wait for water recovery, check well level sensor, X3 input and pump submersion.
When to Ask Support
Send evidence before changing multiple settings
If a fault repeats, take photos before adjusting too much. The fastest support case includes the display code, pump nameplate, wiring photo, PV voltage and water source condition.
Send these details
Product Reference
Check the product path after the installation guide
For model-specific tables and product images, go back to the catalog or model page.
Main Catalog
Solar Pump Inverters
Use this page as the main product route for SP1-SP4 and related systems.
High Power
380V / SP4 Path
For deep wells, large irrigation and three-phase pump motors.
Controllers
SP5 / SP6
For PV pump controller and protected submersible controller work.
Package
Kits & Accessories
For matched pump, drive, panels, sensors and field accessories.
FAQ
Solar pump inverter installation FAQ
Field answers for installers using SolarSeeker pump inverters and controllers.
Can a SolarSeeker inverter start without changing parameters?
If the pump data was confirmed before shipment, SolarSeeker can pre-set the main parameters in the factory. The installer still needs to verify wiring, water source and PV input before starting.
What is included in the factory setup?
For configured orders, we normally check motor voltage and phase, pump power/current range, MPPT solar running mode, auto start logic, dry-run protection, water level input direction and basic fault display.
What is the fastest safe startup process?
Verify model and pump label, connect PV input, connect pump output, connect level sensor if used, power on and check water flow. For three-phase pumps, confirm rotation direction immediately.
What should we do when a fault code appears?
Do not keep restarting blindly. Read the code, check the related water, PV or wiring condition, take a photo of the display and send it with the pump nameplate and wiring photos if the issue is not clear.
Where should installers go for product details after reading this guide?
Use the Solar Pump Inverters catalog to open the correct SP product page, then check the model-specific table and support documents.
Field Support
Do not keep restarting if the same code returns
Send the fault code photo and wiring details. SolarSeeker can help determine whether the issue is PV input, water source, sensor wiring or pump load.
Ask for Installation Support